How to transfer and view MKV files on iPhone
If you’re like me, you likely have a lot of video files that don’t fall under the video files that iPhone officially supports. Doing a quick DuckDuckGo search returns just a handful of options:
- *.mp4
- *.m4v
- *.mov
For example, matroska video (files ending in *.mkv) are not supported by iPhone, and from what I can find on the internet and from personal experience, cannot be imported to the iPhone using iTunes. It seems, the only way to play these files is to convert them into a compatible format (using a program like Handbrake) and transporting them to the phone. This method is both time consuming and too laborious.
The method I describe in this post is a little involved at first. However it’s pretty robust. I’ve tried to make this guide as complete as possible so that you can get set up easily.
What we’re doing here#
We’re going to create a server on our computer that allows us to download our video files (be they Matroska or otherwise) on our iPhone. We’ll then be able to view these files with a third party video player, VLC.
What you’ll need#
- An iPhone running iOS 13.4 or higher (tested on iOS 13.4.1)
- A computer connected to the internet (this tutorial assumes a Windows environment)
- A good home internet plan (if you have big files like I do)
iPhone setup#
What we’re going to be doing is taking advantage of the Shortcuts functionality of iPhone. What shortcuts allow you to do are to run small procedures of “code”. In our case, download files.
-
On your iPhone, navigate to the “Shortcuts” app.
Make your way to the Gallery tab and tap on search. Type in “Download”: the first hit should be called “Download File”. Add it.
This then shows you a confirmation to add the shortcut. Tap on “Add Shortcut”.
For me, I’m prompted to either replace or keep both of my shortcuts (Since I already did this). For you, it should directly add it to your available shortcuts under “My Shortcuts”.
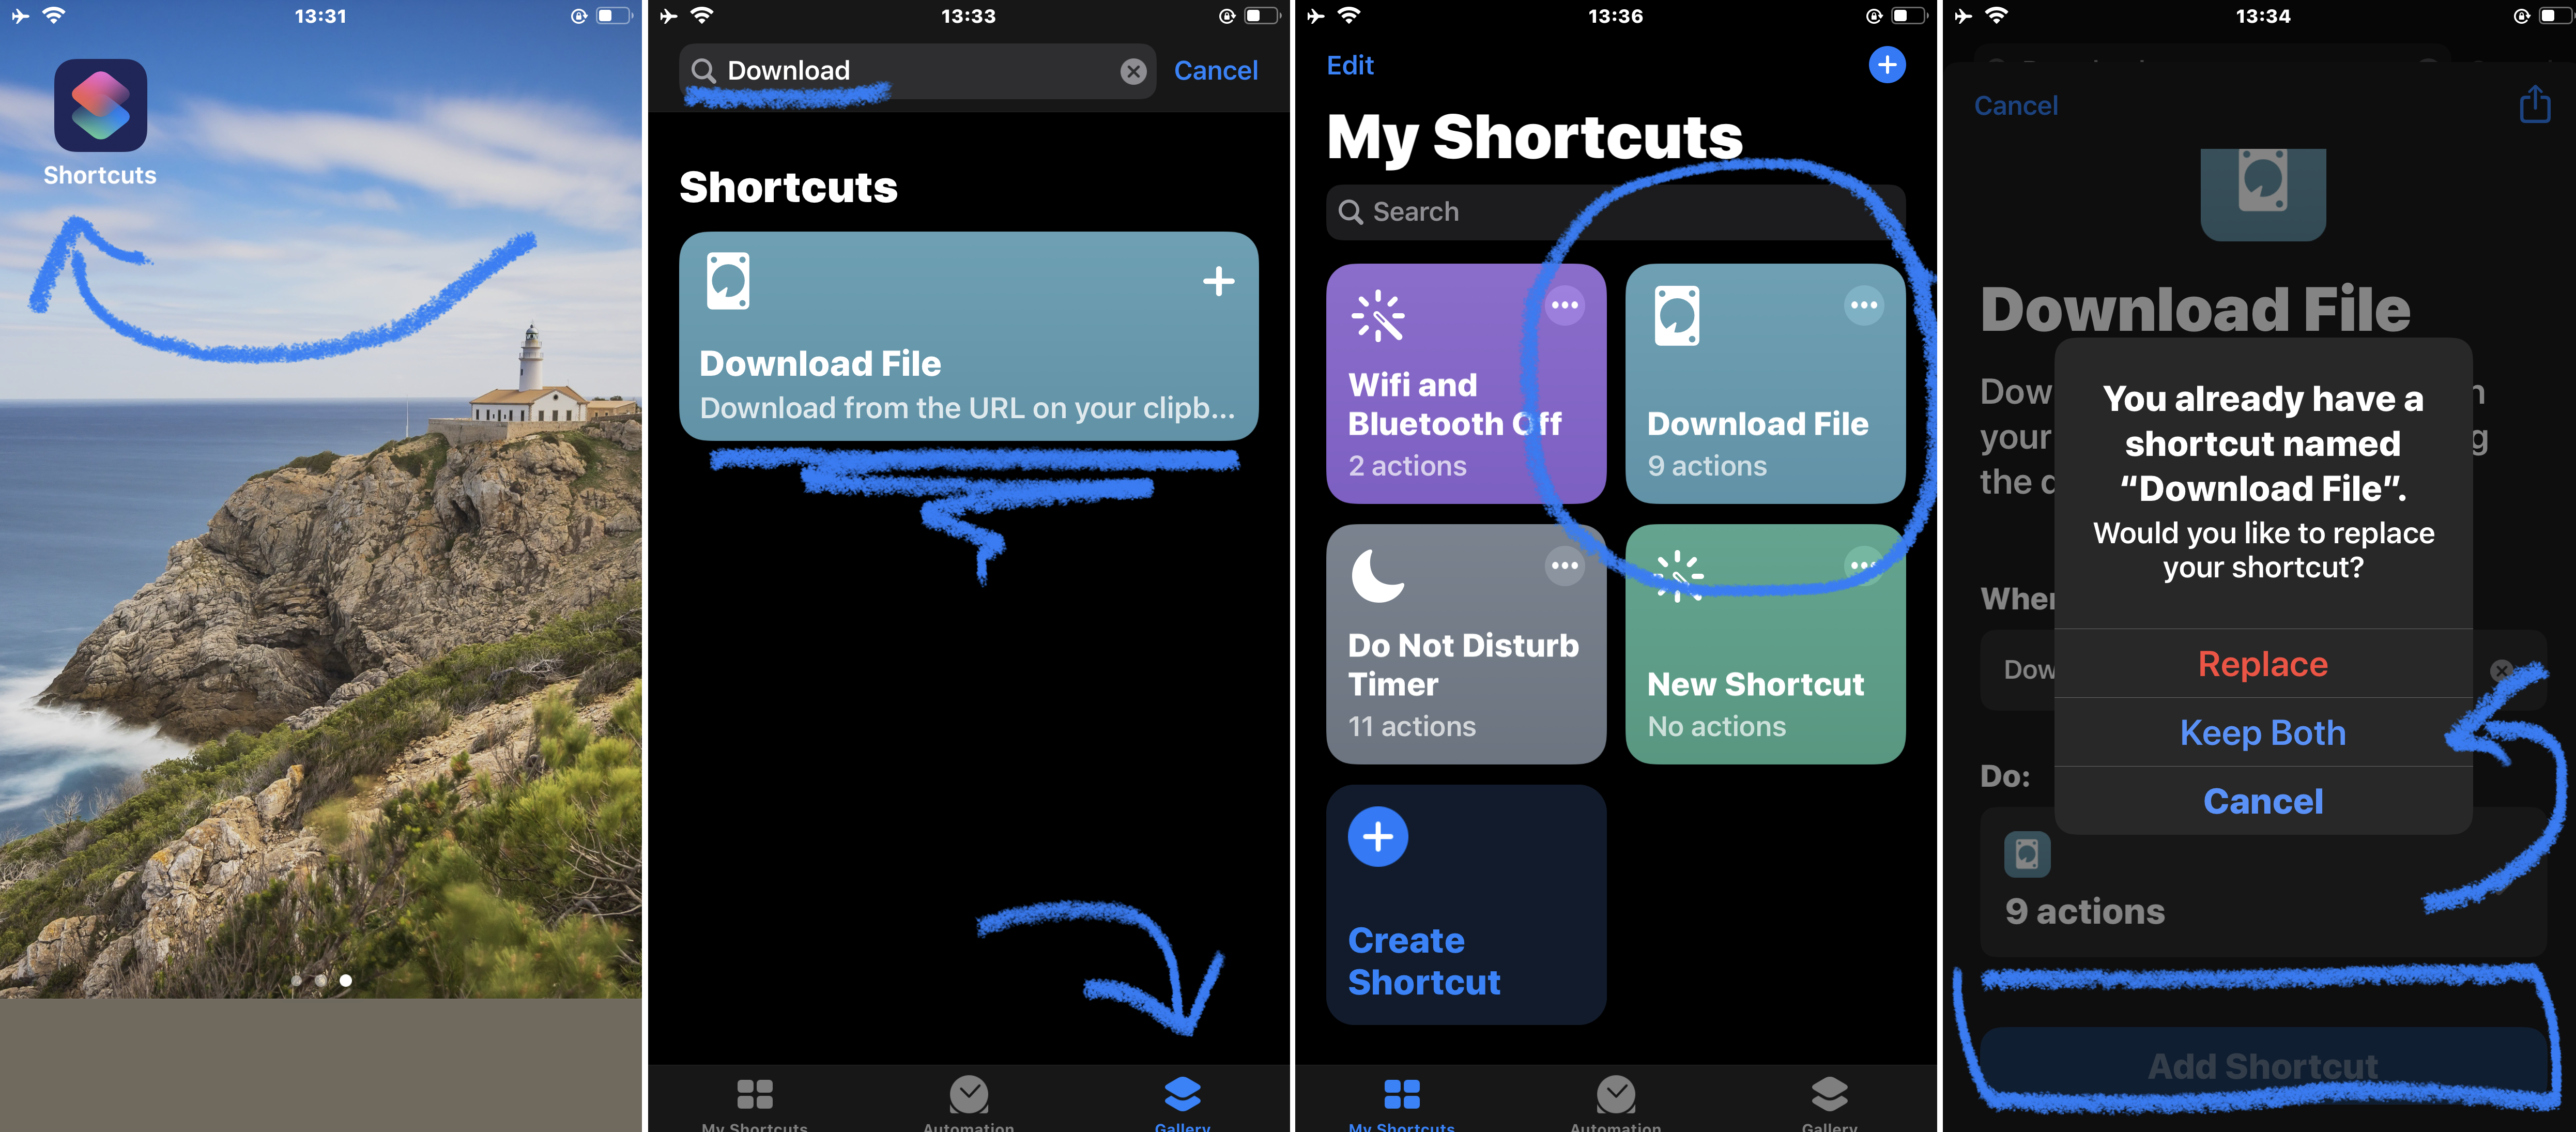
What does the “Download file” shorcut do, exactly? You can take a look at the shortcut description by tapping on the elipsis icon when viewing it under “My Shortcuts”. Basically, the shortcut checks your iphone clipboard to see if you have a valid URL, then checks that URL for a file. If it finds a file, it downloads the file to a folder of your choosing.
-
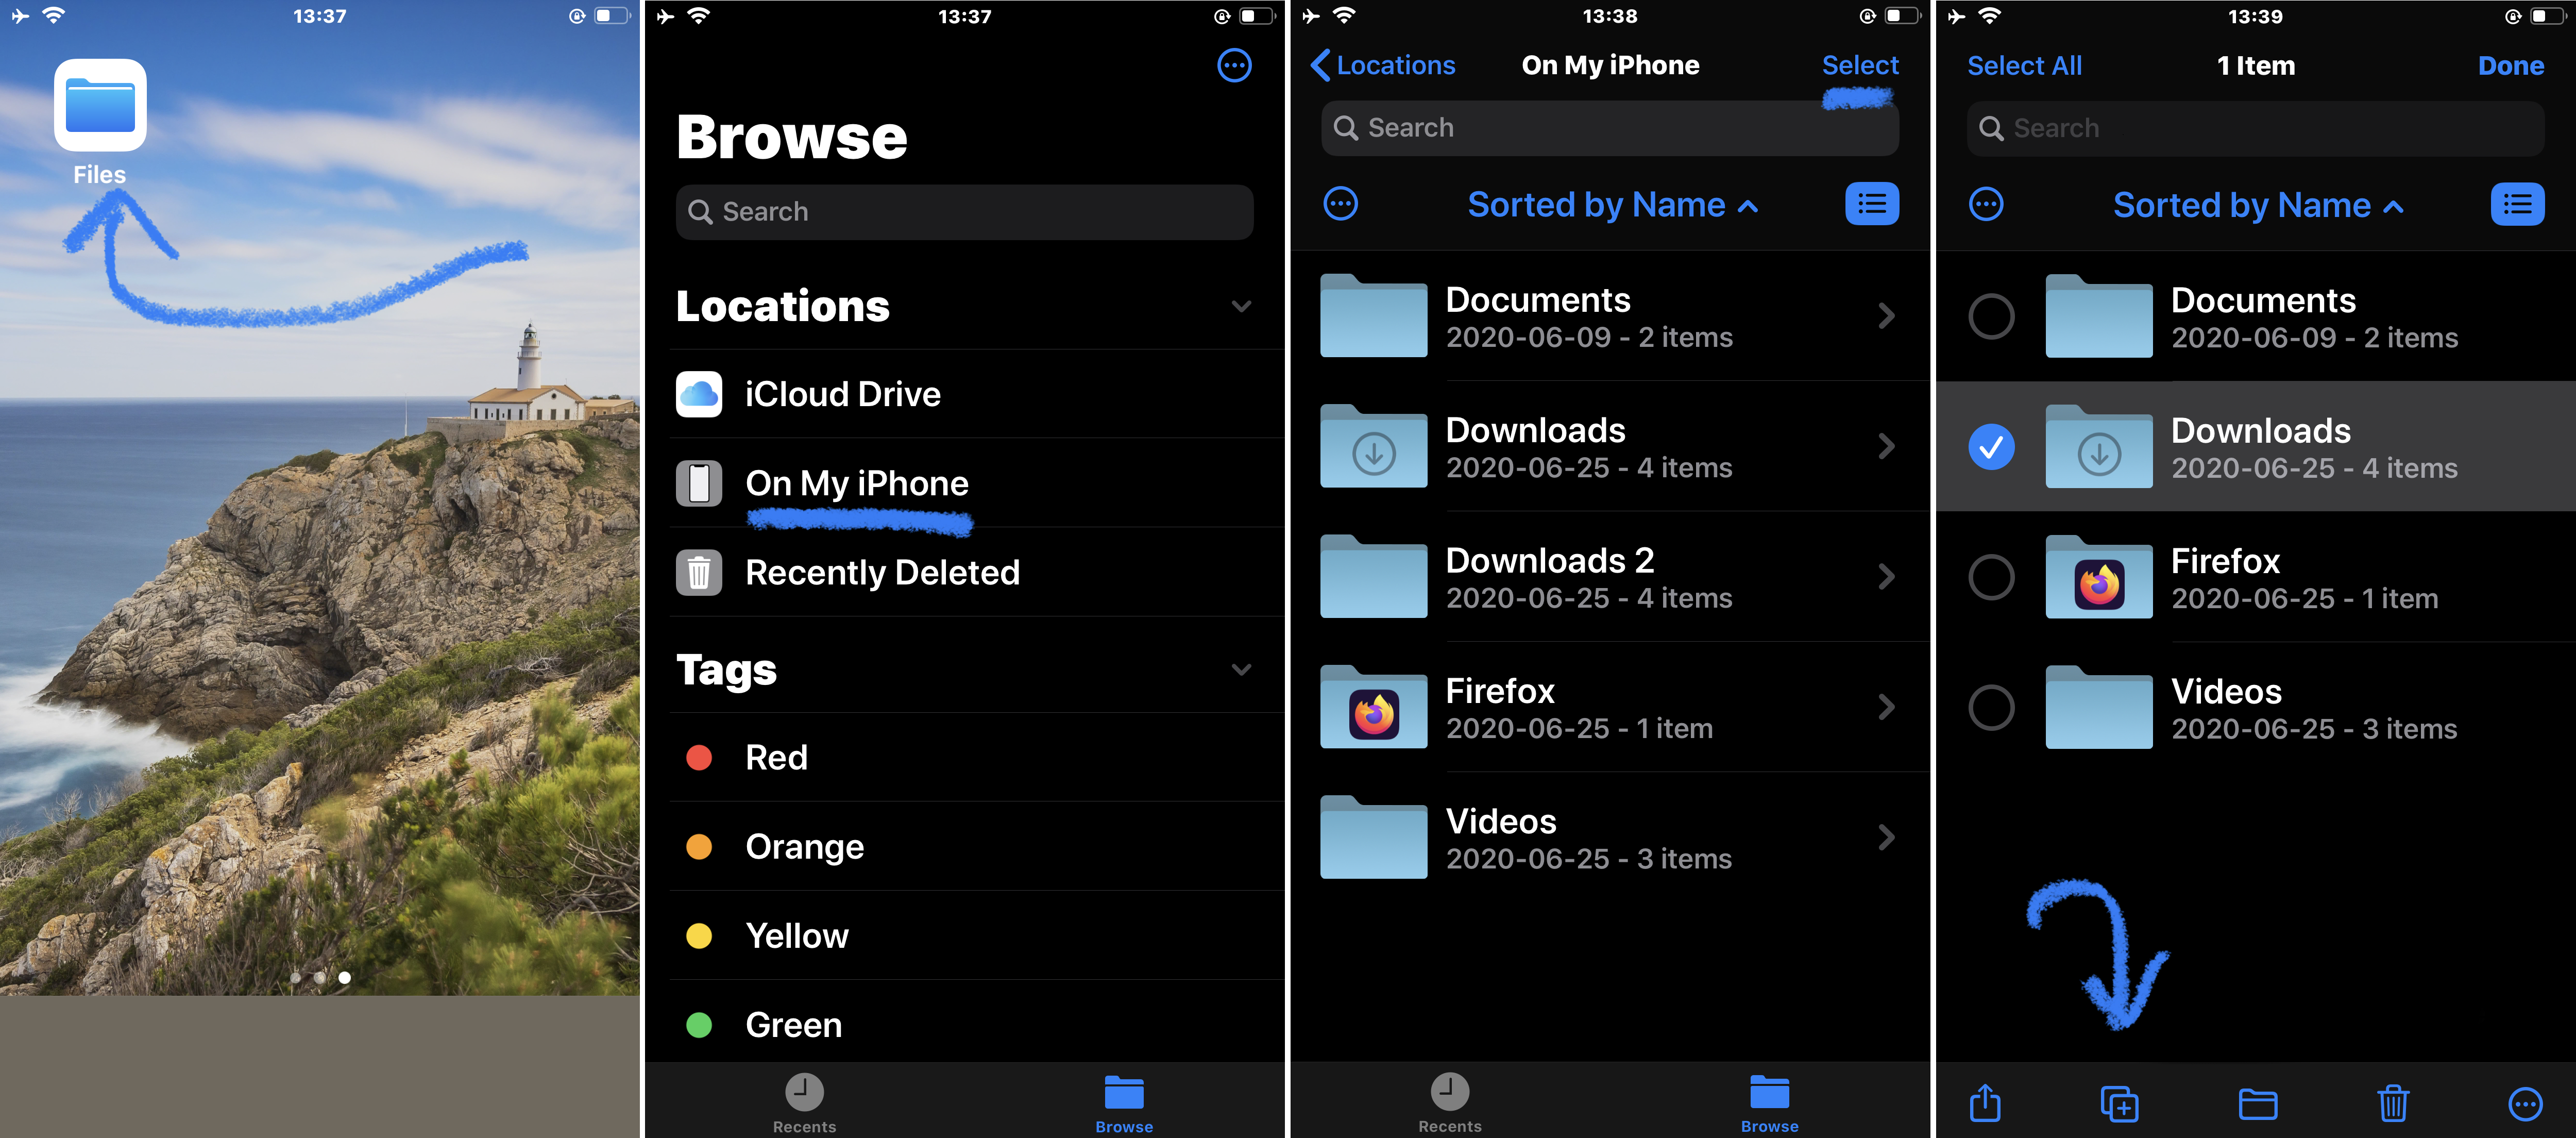
Next, navigate to the “Files” app. You will be greeted with at least two options: “iCloud Drive” and “On My iPhone”. Tap on “On My iPhone”. Here, you’re going to make a new folder.
Of course, making a new folder is not as easy as we’d like, but as you can see, I’ve already been able to make a few folders. If you have any folders available in this view, tap on “Select” on the top right, and select any folder. Once this is done, tap on the icon that looks like a plus sign (on the bottom left). This will duplicate this folder.
Then, tap and hold on this folder until the “rename” option appears and rename it to “videos” or something meaningful.
-
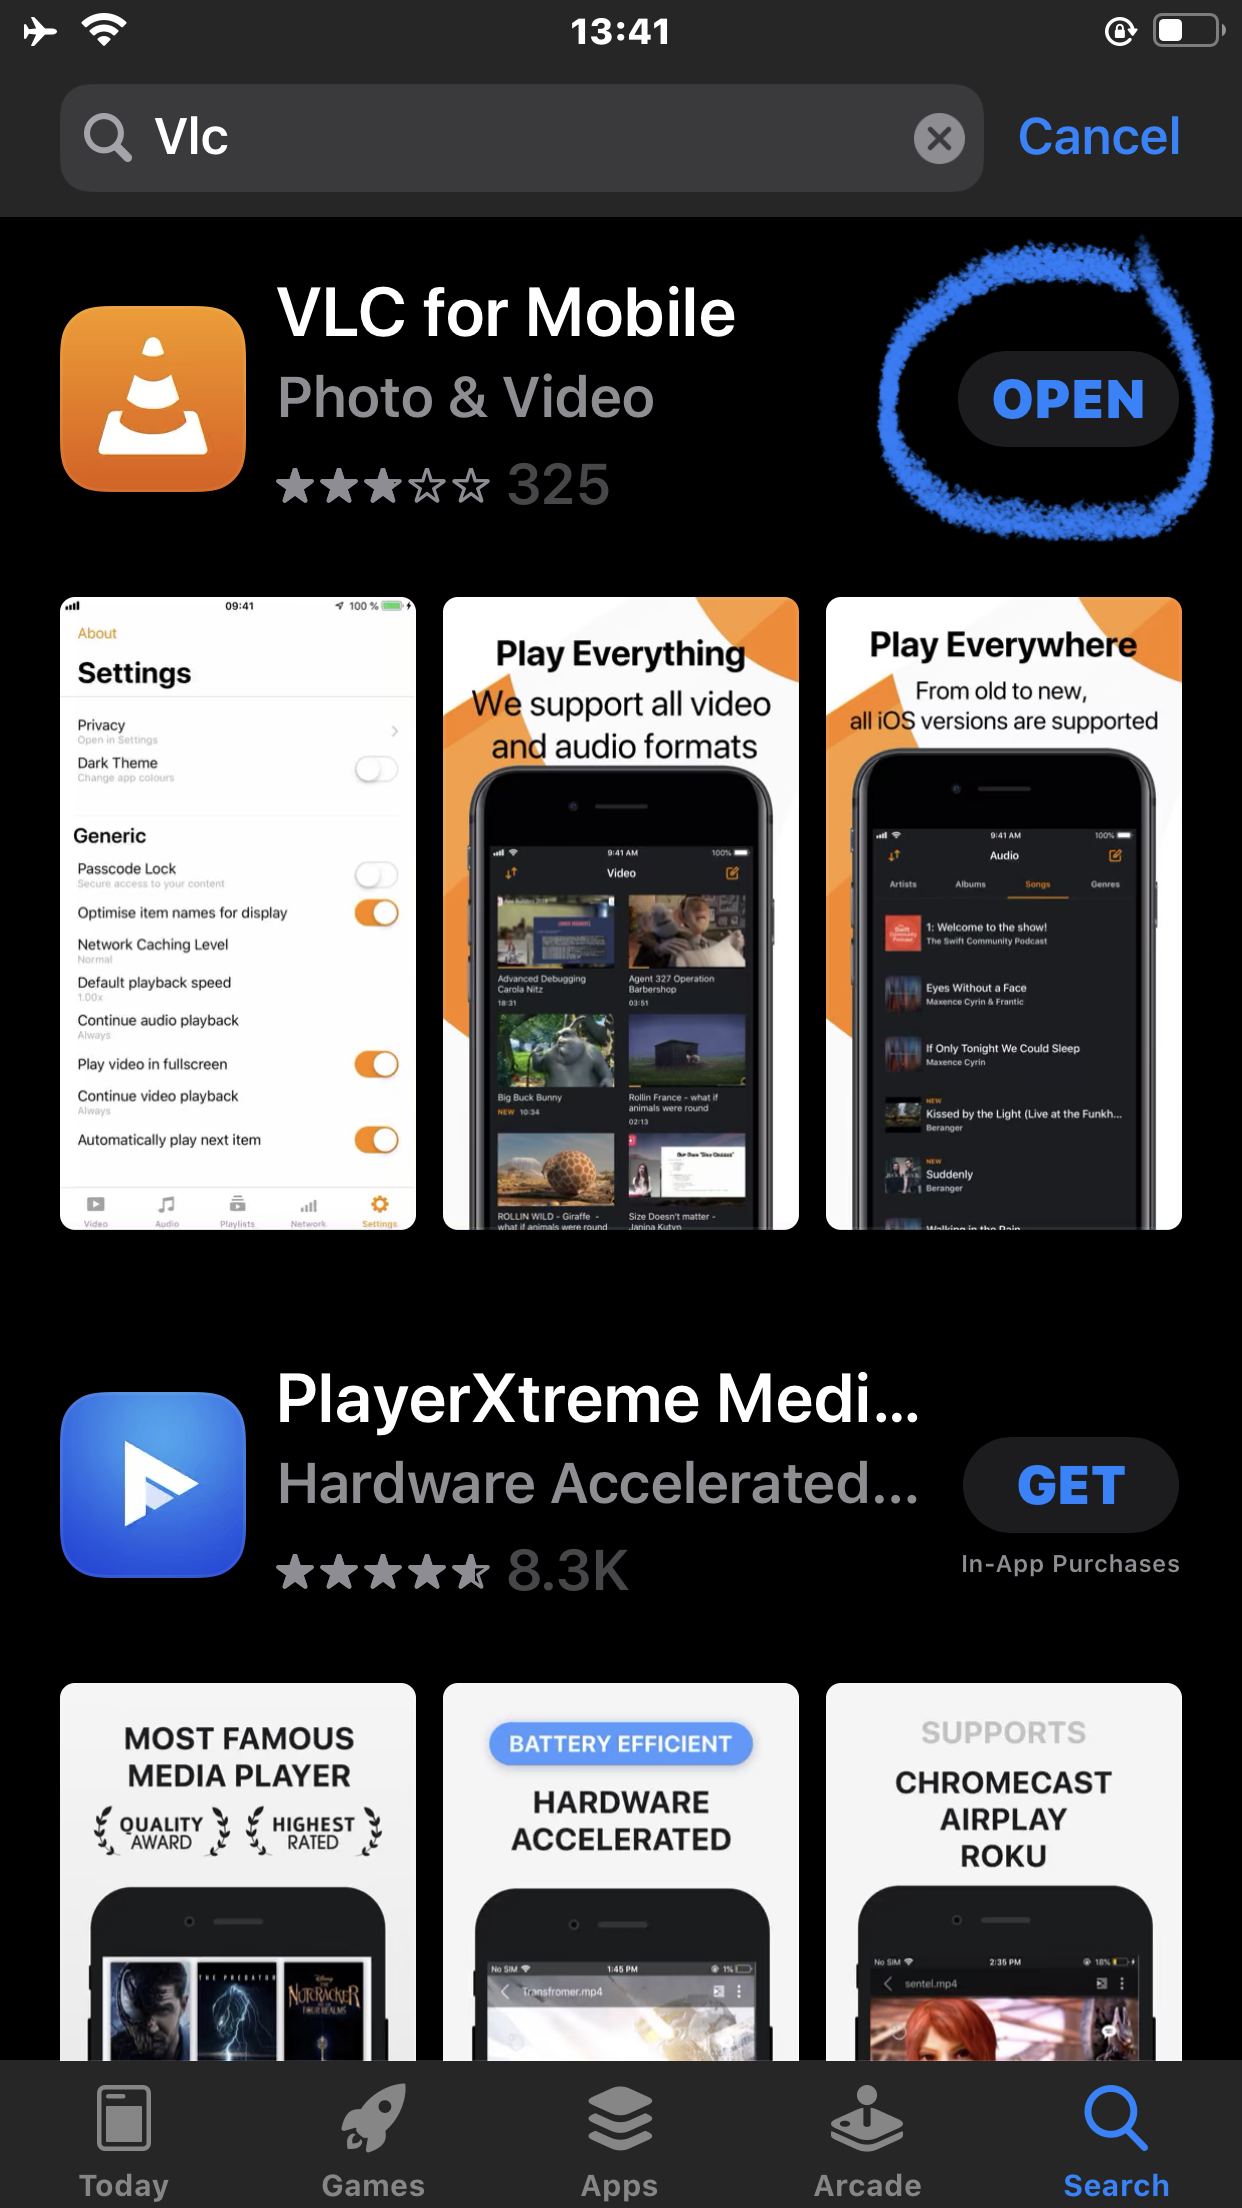
Next, get VLC from the App Store. It has built in codecs that support many different types of videos! It’s also lightweight in that we can use it simply as a video player, and focus on organizing our videos on the iPhone’s built in Files app.
We’re done with our setup on the iPhone. Now, let’s hop on our computer and set it up for transferring videos.
Computer Setup#
We’ll be using something called Node.js and Express so that we can take our video files and “Serve” them on our computer. We’ll also be using something called ngrok to expose our server to the internet and bypass a shortcoming with the “Download” shortcut.
Why ngrok? During my testing with the “Download File” shortcut, I was unsuccessful in downloading content from my computer by directly connecting to it, via its IP address. Hence, we use ngrok to work around this.
-
On your computer, get a copy of Node.js. Installation is pretty easy - just accept the prompts on the installer and accept defaults. To make sure that your Node install went well, press
Win Key + Xon your keyboard and choose “PowerShell”. When the window shows up, typenode -v. You should be greeted with the version of node!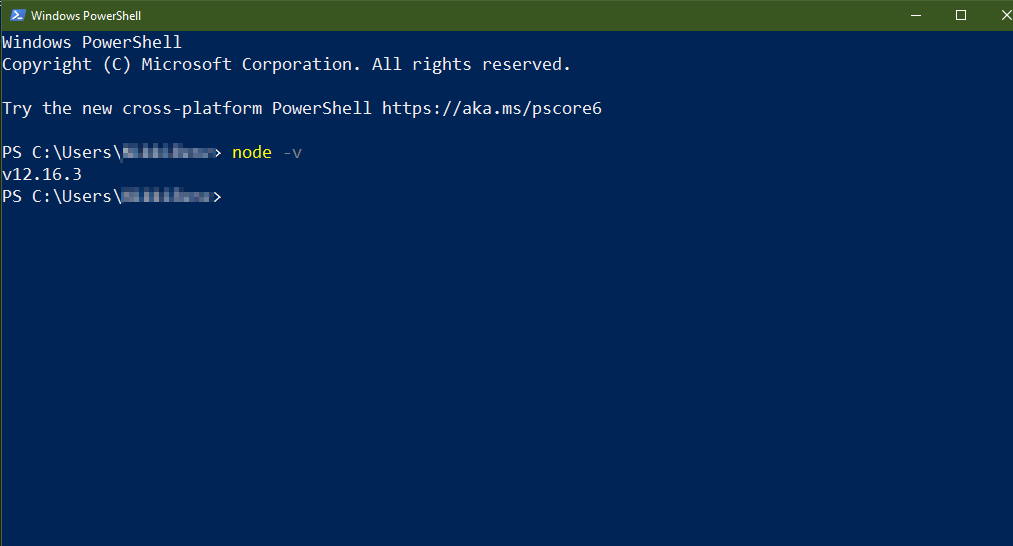
What is node? Node is an environment for running a language called JavaScript. We’ll be leveraging node because it will allow us to run some complex file transporting operations with very little effort.
-
Next, navigate to this small piece of code I wrote on Github:
The code basically asks that a few “node” packages are loaded. After the line that reads
// D:\\Videos\\, there is a variable assignment which sets the directory of where we want our videos to be.After
// SERVE RIGHT TO YOUR DOOR, we use Express’ static file server to whip up our magic.Lastly we output a message to the shell that our server is listening for new connections on port 3000.
On this page, click “Clone” and download the zip to an accessible place. For the sake of this tutorial I downloaded to my desktop. Extract the file.
-
Double click the folder which you just extracted. This will bring up a Windows Explorer window. Hold the
Shiftkey and right click on any empty space of the window. This will show you the context menu with the additional “Open in PowerShell” option. Click on it, which will open yet another PowerShell window. This is important, as the command we’re about to run next requires us to be on PowerShell. You could use cmd as well, however, make sure you’re in the extracted folder.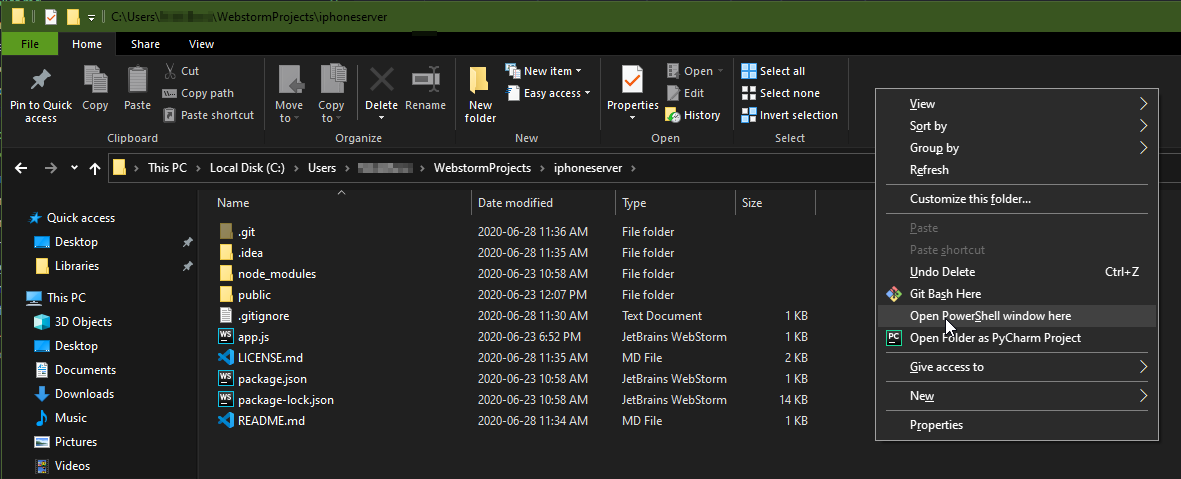
-
In the Powershell window, type in
npm install. This will invoke npm, or node package manager and it essentially installs the server on your computer for you.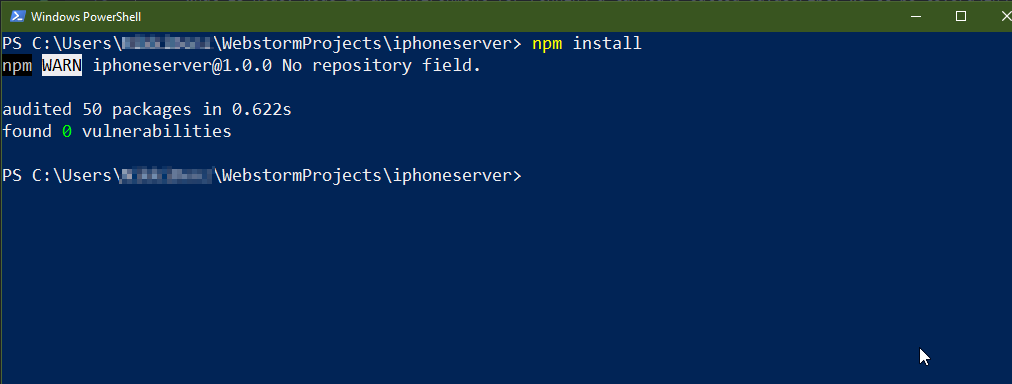
-
We’ll do one more thing and install ngrok. For this step, you’ll need an ngrok account. Go into the ngrok website and create an account. I used a fake email address for my sign-up and was successful. What ngrok does is create a connection between our computer and the outside world, so that we can work around the limitation I outlined earlier.
- Make sure to download and extract the executable. Open the folder where the executable is and perform our
Shifttrick from step 3 to open PowerShell. You can pause here (but keep the ngrok browser window open!)
- Make sure to download and extract the executable. Open the folder where the executable is and perform our
At this point, you should have successfully set up our download shortcut on iPhone, set up a file structure, installed Node and in turn, Express (in the npm install step) and have ngrok installed.
Download files#
What we’re going to do here is to run our node server, configure ngrok, and transfer our video files!
-
First, where are your video files located? For me, I have them located on
D:\Videos\. Normally, yours will be in a different folder. What you have to do is navigate to where your videos are located and get the file location for them. For example, for me to get the exact address of the Videos folder on my computer, I have to follow “videos” and right click on an empty space in explorer. Click on “Properties” and copy the “location” entry - without the word “location”. -
Navigate to the PowerShell window from the last step where ngrok is open. From there, you’ll continue the configuration of ngrok as described on the website you have open. Copy and paste the commands for creating an authentication token, as well as getting the development server started. Make sure to run ngrok using port 3000 instead of port 80 - hence, your command will be
.ngrok 3000instead of.ngrok 80. -
Go back to the PowerShell window where you originally ran
npm install, now run the following command:set VIDEO=${the location where your videos are located, from step 1}It should look something like this:set VIDEO=D:\Videos\Once that’s done, runnode app.js. Your server is up and running!What have we done here? We set an environment variable called VIDEO which describes the full path to where our videos are. This is so the server knows where these files are and can serve them appropriately. Since we are also running ngrok on port 3000, and our server is running on port 3000 of our computer, we can now access our videos from an http link provided by ngrok.
-
Go to the PowerShell window where you have ngrok running. Here, there is a link provided. Select the link, copy and paste it into your browser. Go to the link; if you were able to follow the steps you’ll be able to see a message saying “Server is up and running”
Actually downloading your files#
The way we have set up the server is that by appending a filename to the server URL provided by ngrok, the server in return provides that file from our computer (assuming it is in the Videos folder). Thus, if I have a video named “test.mkv” inside the Videos folder from the previous section, and I access ngrokurl.com/test.mkv on my browser, the server will provide this file for viewing.
-
Try this out. Create a link like the one above for a file you wish to access. Copy it into a text editor such as notepad, and paste it completely into the browser. Make sure it works!
-
Once you have this working, send the link to your phone. You can send it via email, etc. I used Facebook Messenger as I can access the link I send myself.
-
Once you have the link on your phone, tap and hold the link - you will see different choices for what to do with the link. At the bottom, you should see “Download File” - tap it.
-
Once the shortcut starts up, you will be able to choose where to save your video. Save it to the videos folder we created in the preparation steps.
-
The video will download. Shortcuts has a nifty way of showing you download progress by means of a progress bar in the current download step.
-
Once the download is complete, navigate to Files in your iPhone. Find the video you downloaded. Tap and hold the video, where you will get Application options. Swipe to the left until you find VLC - tap VLC.

And, ta-da! You are now able to view your MKV video thanks to VLC.
Cleaning Up#
You’ve succesfully set up your server to send videos to your iPhone. If you want to complete this again, the steps are much shorter:
- Go to the folder where you have the node server, and, using the
Shiftright-click trick we learned earlier, open a PowerShell window and type the commandnode app.js. This starts the video server. - Go to where you have ngrok installed and, with the same PowerShell trick used in step 1, run
.ngrok 3000. - Create your URLs. If your file is accessible from
video_folder_root/test.mkv, and your ngrok url ishttps://test.ngrok.io/, then the link to download this file ishttps://test.ngrok.io/test.mkv. Use the “Download File” shortcut on your iPhone to download. - Lastly, open the video up in VLC from the Files app!